If you've used pocket screws for very long at all, you've probably run into this problem once or twice: the screw pokes out the other side of the workpiece you're fastening to. Most times this problem is felt before it's seen: you're moving an assembled case down from your bench, one hand slides along the corner and OUCH!!!! you've torn a chunk out of your hide. Hopefully you haven't left a bloodstain where it will show.
I was going to say the three main causes of this problem are 1) a void under the screwhead which lets the workpiece you've bored collapse as you drive the screw, 2) inadvertently boring a little too deeply, and 3) setting the clutch on your drill/driver for too much torque, so the drill keeps driving the screw even after it's reached the bottom of the pocket.
I'm not so sure about reason number 3, but after today I'm adding reason 4 to the list: workpiece thinner than specs! I was getting ready to install drawers in this case, and just to double check my calculations I measured the height inside the case. It was a bit over 1/8” taller than it should be, meaning that the plywood top and bottom were a hair over 1/16” thinner than the nominal 3/4”. We're used to seeing hardwood ply 23/32 instead of a full ¾, or 24/32, thick. This ply is 21/32! I would have been much better off setting my boring depth for a 5/8” workpiece rather than 3/4”, which is my habit when I'm building cabinets. It may be time to change that habit.
So how to save the situation? Something I have tried that doesn't work is just sanding it down with my random orbit sander. Trust me, don't do it. The replacement backing pad for my old Makita sander was $15. One choice would be, take the cabinet apart, bore new shallower pocket holes, and reassemble the cabinet. Another would be to remove the offending screw from its hole, use wirecutters or a grinder to make it a little shorter, redrive the screw, and fill the hole if it shows. I think this is the way to go if the screw has poked out through a surface that will show in the finished product. Here, though, the screw poked out a cabinet side which will be hidden when the cabinet takes its place in the middle of a run, so I took a quicker approach: I filed it down.
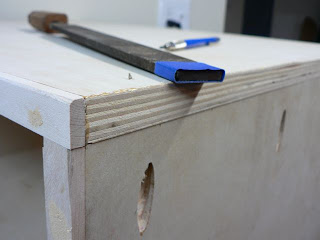
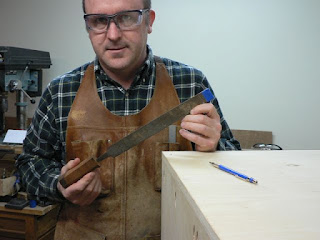
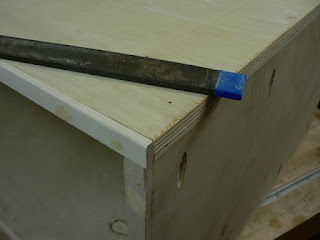
Use a big, flat file. I used a 12” mill file for this job. Hold the tip of the file flat on the surface you're flushing the screw tip to as you file. Note the tape wrapped around the tip of the file. This is the key to this trick. The tape stops you from scratching the cabinet side with the end of the file (which usually has a pretty big burr), and it stops you from filing down the whole side of the case when the screw is flush. Also note that I've added a wooden handle to the file's tang. You can buy these handles, or you can make your own with scraps, which is what I do. Just shape a scrap of solid wood so it's comfortable to hold, drill a hole that's a snug fit for the tang, and pop it on with a few hammer taps. The palms of your hands will thank you.
Pocket screws are hardened, but they're still just a tad softer than the file. It makes a terrible shriek for the first couple of strokes, but after that it's not so bad. Every couple of strokes, clear away the iron filings so you don't smash them into the wood where they'll give you trouble later.


thank you for the suggestion! I actually backed them out, cut them, and put them back in :) Thanks for helping my paint fumed brain
ReplyDeleteThanks! Always glad to help.
ReplyDelete