Here's
another hand tool jig. This one is more specific than the dovetail
paring jig I showed in the last entry, because it's built to help
with one particular step in one particular project. I use it to turn
tapered square chair leg blanks into tapered octagons when I make the
ladderback chair developed by J. Alexander and Drew Langsner. The
dovetail jig can be used for joints of different thicknesses and
widths, and I can even picture myself using it to fair up tenon
shoulders. But this leg-tapering jig is so specific that I doubt it
will ever be used for anything but this project.
First
I'll show about making and using the jig, and then I'll explain my
thinking a little bit.
Fortunately,
though this jig is very specialized, it's also pretty simple, and
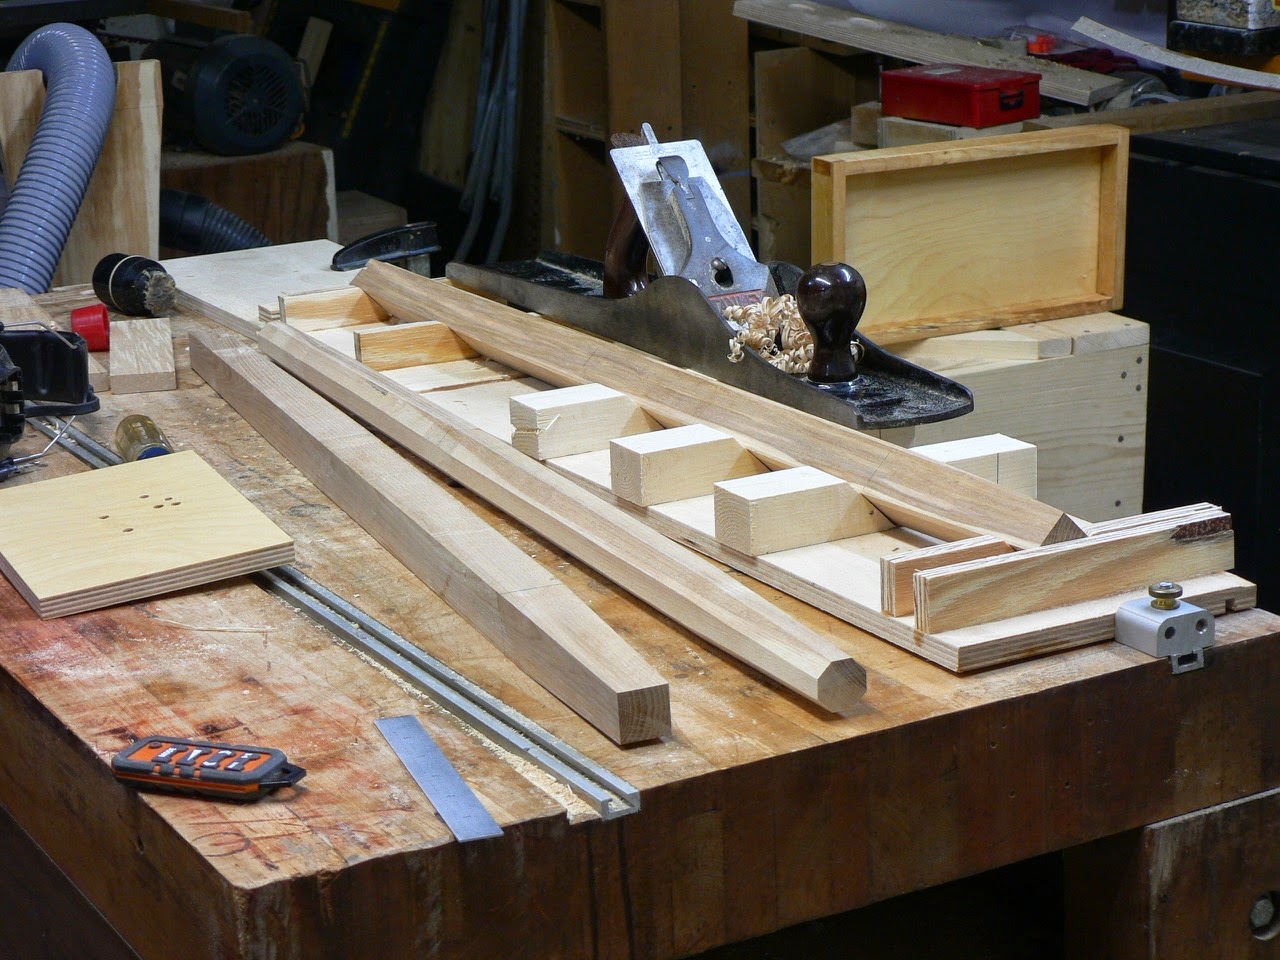
quick to make. I found a piece of 1/2” plywood longer and wider
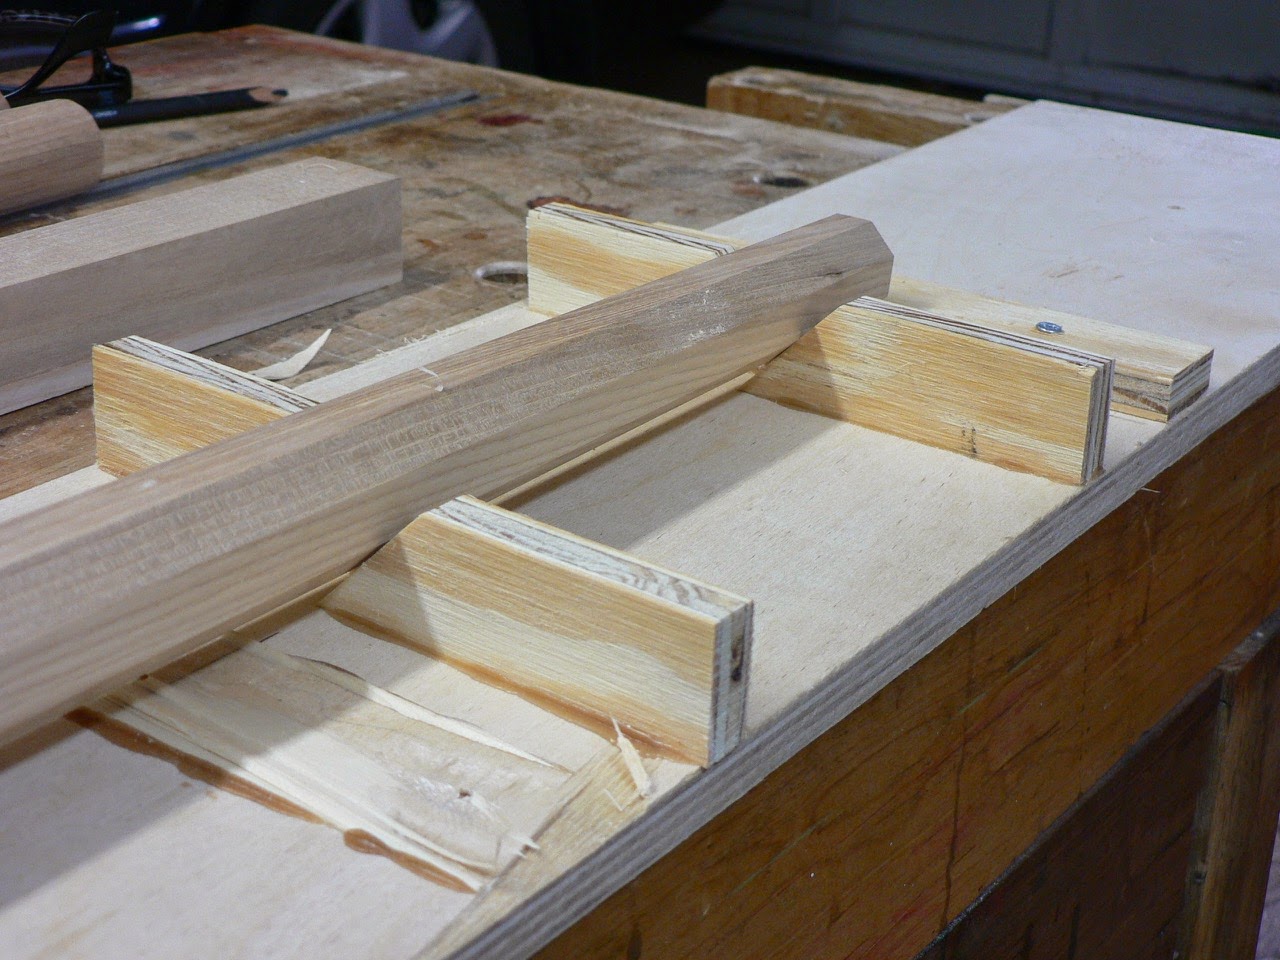
than the leg will be. Then I cut some small stock at 45 degrees to
make blocks that form a cradle for the leg blank. I glued two pairs
of blocks down with their pointy ends touching each other - - they
cradle the middle “cage” section of the legs where there is no
taper.
Once they were securely glued in place, I laid a leg blank
(already tapered) into this cradle. That guided the placement of
additional pairs of blocks to support the tapered sections of the
leg. The foot taper is only about 5” long, so a pair of blocks out
at the very foot end suffice to hold it up. I put glue on the tapered
blocks and slid them into place so they just touched the face of the
leg. Each block has to go beyond the centerline of the jig, so the
blocks pass alongside each other rather than confront each other. The longer taper on the upper leg has two pairs of these by-passing blocks.
When placing the blocks under the tapered sections, I made
sure not to position them where they would actually lift the leg up.
Once all the cradle blocks were in place, I confirmed that a properly
prepared leg blank would rest on all the blocks, rather than just a
few of them.
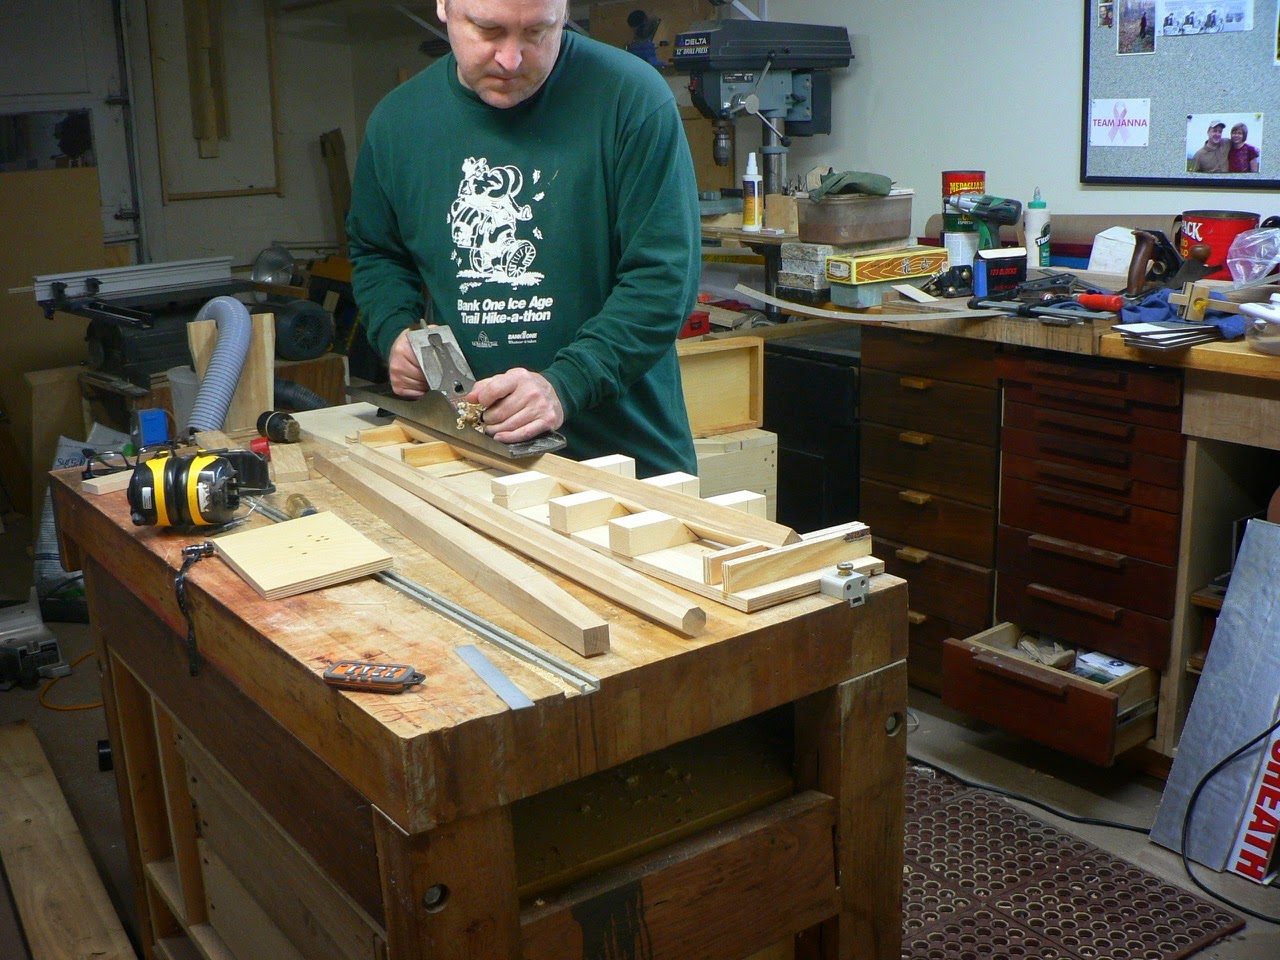
When I
dreamed this jig up, I assumed I would have to find a way to clamp
the legs down while I planed, but no. A stop at either end is all it
takes. The weight of the plane holds the leg blank down, the cradle
of 45 degree crosspieces keeps it from rotating, and the end stops
prevent it from getting pushed out the end of the jig.
Using
the jig is simple. I put the tapered square blank in place, and
carefully plane the center, non-tapered “cage” section. If you do
this right, the flat chamfer you plane will gradually extend out into
both tapers, so be aware of this. Rotate the blank from face to face
until the chamfers you're making with the plane are the same size as
the original four faces of the leg blank. Your goal is to make a
regular octagon, with all faces the same width.
When
the central non-tapered section is done, I move on to the foot
tapers. Again, pay attention to be sure you end up with all the faces
of the foot the same width, a regular octagon that tapers down to 1”
at the end. I take care of the long taper at the top of the leg last.
I tapered three back legs in about an hour with this jig.
Which
raises the question: Why? Why am I using a jig to do something that a
good bodger would do by eye, far more quickly? Several reasons.
The
immediate reason is that I am making these chairs too slowly. I cut
the tree down, rived the blanks, and surfaced the legs and rungs into
squares, over a year ago. Then I got pulled away to other projects,
and by the time I got back to making this chair, the wood had become
much drier than what I'm used to working on with drawknife and
spokeshave. So I am adapting the process I learned at Country
Workshops to work with the tools I use on drier wood. The handplane
cuts dry wood very accurately and leaves a beautiful surface, but
isn't well suited for use at a shaving horse. This jig works much
more quickly than laboriously clamping the blank in every orientation
needed. Whether I would use it for green wood, I doubt.
Another
reason is that I am new to making round parts with hand tools, and I
am trying to learn one part of the process at a time. In order to get
good results while I do it, I need to work backwards, which means
starting with accurately prepared tapered octagons and rounding them
with a spokeshave. Once I have that down pat I can go back one step,
and move from tapered squares to tapered octagons via drawknife and
spokeshave. And I will.
Jigs
for hand tools? Some might question this, when generations of bodgers
made these chairs with by-eye measurement and a very few tools and
holding fixtures. My answer here is the same as my answer for
sharpening. If we were true apprentices, who learned each aspect of every process involved in
making a product through thousands of repetitions day in and out,
the jig would indeed get in the way of learning. But most of us do
this in our spare time, and don't have the luxury of all those
thousands of repetitions under the direct supervision of a master
whose livelihood was on the line. For us, a honing jig for sharpening
and a tapering jig for getting a leg blank worth the labor of
rounding is what allows us to come to understand what good results
look and feel like, and what goes into getting them. If we use jigs
like these mindfully, they can be learning tools that help us develop
all our skills, rather than crutches that prevent us from going
beyond mediocrity.


No comments:
New comments are not allowed.