How do
I surface a big board if I don't have a jointer? In this post, I'm
going to show you one way to do it. There are many ways to skin this
particular cat, but this way works, and the basic principles apply in
lots of situations.
Getting
some big boards surfaced is the first step in a project that will
stretch out across several blog posts:
I'm making a solid countertop
for a run of shop cabinets I'm installing in my home shop. This time
we'll cover surfacing the boards; next we'll handle jointing the
edges and gluing up the countertop, and finally we'll surface the
slab after it's glued up to its full 28” by 88” glory.
Why do
you need a jointer at all? And how can we make do without, if buying
one doesn't fit our budget?
First
things first: in a modern shop that's fully equipped with all the
major machines, the jointer's primary use is in making one face of a
board flat, so that a planer can bring the opposite face into
flatness and parallel with the first face. Many woodworkers think
that a planer's job is to make the faces of a board flat. Actually,
the planer's job is to make the top face of the board parallel to the
bottom face of the board. By “bottom face,” I mean whichever face
is lying on the bed of the planer. If you run a twisted board through
a planer, you'll just end up with a twisted board that's thinner than
it was a moment ago. Jointing edges is the jointer's secondary job.
But
even if you have a jointer, it might be narrower than the board you
need to surface. Or your board might be so long and heavy that it's
too difficult to safely balance on the tables of your jointer. This
is where a $100,000 budget would be nice: Just buy a 16” wide
jointer and forget about it. At least, until you find a 30” wide
mahogany slab to play with . . . then you can come back here and read
about how to surface a board wider than your jointer!
A lot
of woodworkers have access to a portable planer, which usually has a
12” or 13” capacity, but few of us have access to a 12” wide
jointer. If this is your case, and you have some 8 inch or 10 inch
wide boards to surface, think about doing what I do. Just work on one
face of each board until it's planer-ready. Then, run each board
through the planer with the planer-ready face down until the top face
is flat. Finally, flip the board over and plane the planer-ready face
until it's flat. Notice that I'm making a distinction between “flat”
and “planer-ready.” If you want to completely flatten all your
lumber by hand, more power to you. I've done plenty of that myself.
In fact, I built my first several pieces of furniture from roughsawn
hardwood without access to power tools, and so I know the routine
well enough. But I'd rather just fool the planer into thinking a flat
face is running along its bed. I shape one face so that it is just
barely concave along its length, concave across its width, and has no
twist. Here's a crude Sketchup rendering of a board whose top face is "planer ready." The geometry is grossly exaggerated so you can see what I mean by "concave across its width."

If I run the top face of that board through a planer, the planer will act as though it's flat. How do I get a board that way? I'll explain how as we go along. Here's how my weekend went:
If I run the top face of that board through a planer, the planer will act as though it's flat. How do I get a board that way? I'll explain how as we go along. Here's how my weekend went:
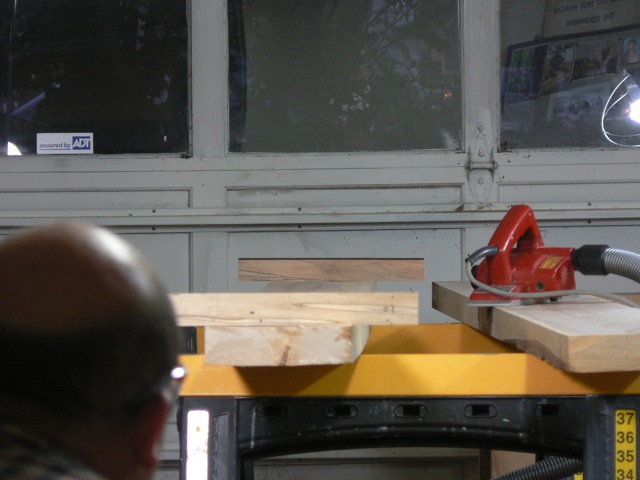
I have
easy access to a 15” planer, but the only jointer available is 6”
wide and 42” long - - - completely inadequate for 92” long birch
2x8. But once I get one face on each board flat, the big planer can handle them no problem at all. It does a
great job: fast and accurate, and all the boards will be within a
hundredth of an inch of the same thickness.
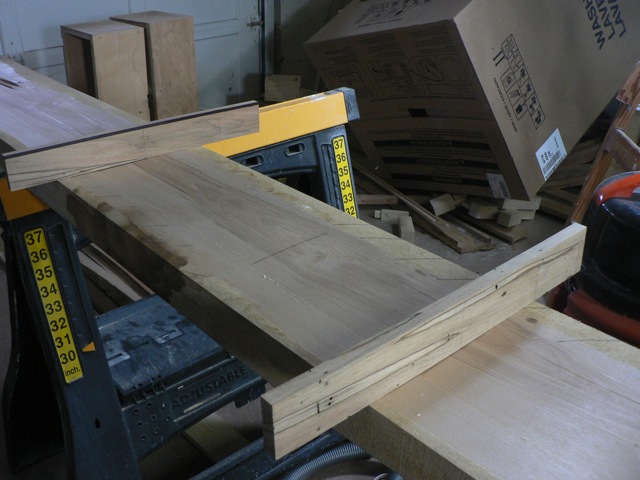
First,
I cut all the boards to a rough length, about 5” longer than I
think the finished countertop will need to be. I could have done this
with a circular saw in my shop, but I needed to cut the boards down
so they'd fit into my station wagon and there's no electricity in my
storage trailer. I used my beloved frame saw to cut off the bad ends.
As you can see it was a nice day, sunny and warm, so it was quite a
treat to be outside sawing away.

Now
it's time to make these boards planer ready. If one face is perfectly
flat, no problem, put a crayon mark on it and run it through the
planer crayon down. But none of these boards were flat, so I assessed
them for curvature in 3 directions. First, I checked along the length
of the board. Second, across the width. Third, I checked for twist.
Whichever face is concave along its length, or can more easily be
made so, is the one we'll work on.
Next,
I looked at the length-concave face to see whether it was cupped
across its width. On the first board, it was indeed strongly cupped,
but unfortunately the face I wanted to work was convex. This is a
problem for two reasons: Firstly because if I send a convex surface
traveling along a planer bed, it will be free to rock back and forth
as it's machined, so I'll have no hope of getting the top face flat.
Secondly because winding sticks are useless on a convex surface, so I
won't be able to tell how badly twisted that face is. The photograph
here will make that second problem clear: since the winding stick
only touches in one spot, it's free to rotate, and so its position
has nothing to do with how twisted the board is.

The
solution is simple: make the face concave across its width by
removing wood everywhere except the edges. Plow a lengthwise trench down the
center of the board, leaving two narrow strips of roughsawn wood at
either edge, so that the winding sticks will only rest in one
position across the face of the board. It really doesn't matter how
you remove the wood. You can use a scrub plane, a grinder, a disc or
belt sander, or anything else you want. Just remove wood until you
see something like this under the winding stick along the whole
length of the board:

So
now, you have two of the three types of curvature under control:
you're working on the face of the board that is slightly concave
along its length, and you've made it so that it's also concave across
its width, along its whole length. You're now free to work on the
twist, and that's where winding sticks really come into play. See how the
top edge of the back winding stick is black?
The
fancy, traditional way to make that is by inlaying a strip of ebony
along that edge. On the day I made these winding sticks I had no
ebony, so I used a Sharpie marker. As you can see, it makes it quite
easy to tell which direction the board is twisting. Here are the
steps:
- Check with winding sticks in three positions: a foot away from each other at the center of the board, halfway between there and the ends, and then right near the ends. Usually, you find that the twist increases as you approach the ends of the board.
- Make no more than three passes of the electric planer (or jack plane, or disc sander, etc.) on each end of the board, obviously attacking the high side of the board only. The first pass is only on the foot nearest the end, the next pass is only on the two feet nearest the end, and the third pass is on the three feet nearest the end. Notice how that means you're taking three times as much from the end of the board as from the center?
- Use the winding sticks to check your work. Hopefully, the winding sticks are closer to level than they were a while ago. Sometimes, the winding sticks show that you've lost the concave shape across the width:
 You can see the pencil marks where the winding stick is touching a high point. I use the pencil as a guide to show me where to re-excavate my lengthwise trench, so that I can check for twist with the winding sticks again.
 - Use a long straightedge or a string (or your eye if you're well-practiced) to make sure the board is still slightly concave along its length. If you need to, plane away the full width of the center of the board until the entire face is concave along its length again.
- Repeat steps 1 through 4 until you have a board that doesn't twist, is very slightly concave along its length, and is concave across its width.
The
first few times you do this, it takes a long, long time. But once you
get used to checking your work often, so that you don't go WAAAAY too
far in some spots, you'll be able to very proficiently make a
board planer ready. Including taking all the pictures, I got my 5
boards ready for the planer in under 2 hours. Then I only needed
about half an hour of planer time to have 5 flat, non-twisting boards
that are all the same thickness. Next step: edge jointing! My little
tiny 42” long jointer isn't adequate for these, so I'll show you
what to do if you don't have access to a jointer, or if you have to
get a slab too massive to lift and run across a jointer ready for
edge-gluing.


No comments:
Post a Comment
This blog is not meant to be a forum for any and all viewpoints. However, I do welcome questions or comments that help clarify the information in my posts. I try to close comments after a few months, so if you have a question about an old post, please feel free to email me directly: spirithillwoodworks@gmail.com.