When you get lucky and score a bunch of nice fresh wood like this black cherry, seal the end grain before it starts drying out.
Moisture leaves wood most easily through the end grain, less easily through the long grain, and least easily through
the bark. Cracking (the proper jargon is "checking") happens worst with the logs left full round, bark on and ends unsealed; least with the log split into quarters or eighths and the ends sealed. In this instance, the wood was meant to become spoons, and halves were what I wanted, so before I even cut down the tree, I was ready to seal the logs.
Any piece of wood that includes the pith of the tree will check, and the checks will radiate out from the pith. Exceptions to this rule are scarce and inconsistent enough to make it as close to an absolute as anything in woodworking.
Sealing the end grain has the effect of slowing down moisture loss through the end grain. As wood loses moisture, it shrinks. If it's losing moisture much more quickly in one area, say the ends, the wood there shrinks, while the wetter wood next to it remains the same size. This causes stress in the drier wood, which eventually is relieved by cracking. "Eventually" is a relative term; often you can see checks radiating out from the pith within an hour or two of the tree being cut down. Sometimes the tree will crack as you cut it down or as it hits the ground; these cracks will widen as drying progresses.
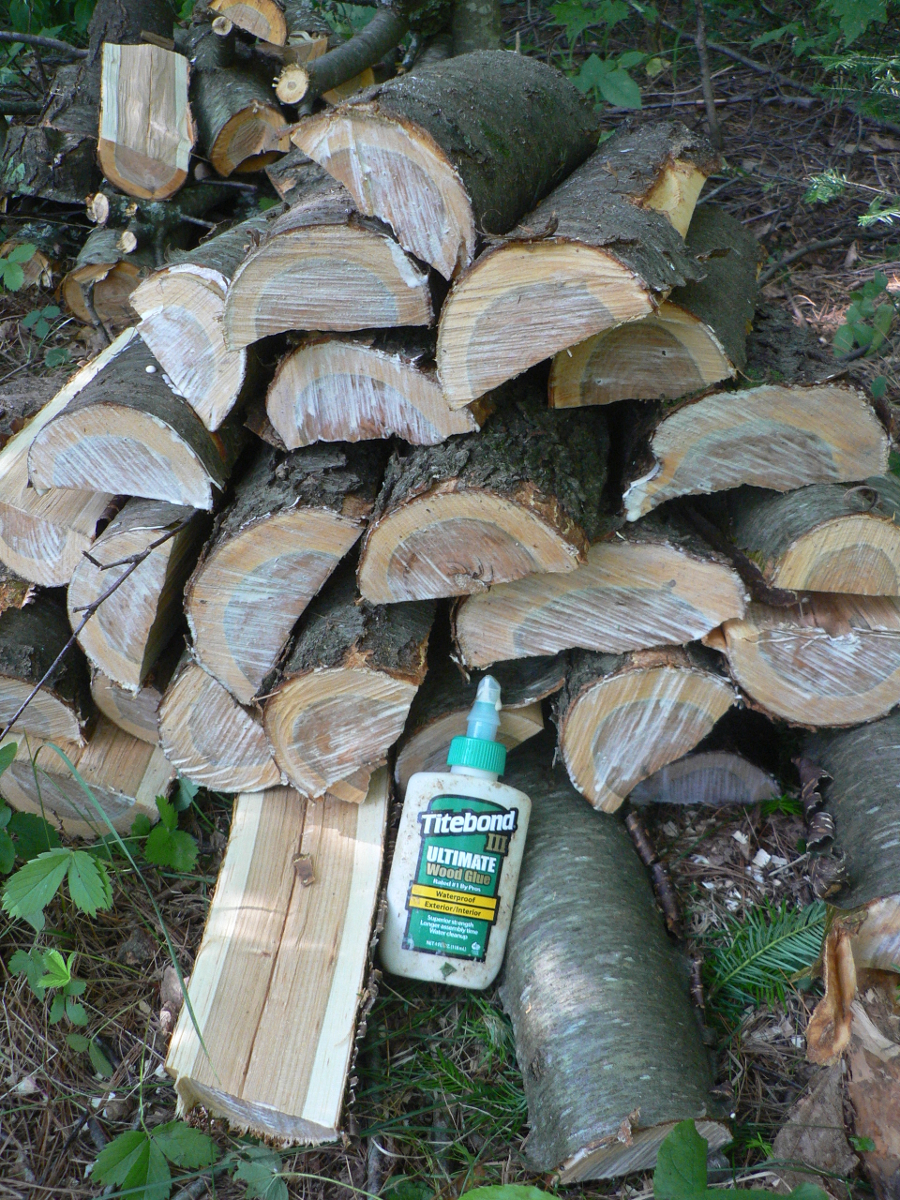
"What should I seal it with?" is a frequently-asked question. The answer is: "A preposition is not what you end a sentence with." I have had good results with a couple of coats of latex paint, but better results with what you see in these photos: plain old glue. This Titebond III remains more elastic when cured than other PVA glues, so I really like it.

I lost track of one of the loglets in the above photos, and it knocked around in the back of my pickup for 19 months. Here's what it looks like today:


It's probably a bit dry to carve easily, but not much checking considering all the time it's spent in the sun and rain!

Bonus image: the immature fruit of the beaked hazel. Don't let the cute, fuzzy appearance of those hairs fool you. In reality they are very sharp needles that stick in your skin, many of them too small to be seen clearly, so removing them without driving them below the surface of your skin is a challenge. They sting badly enough that once the nuts are ripe, you WILL harvest them with good gloves on. The nuts are smaller than your ordinary hazelnut or filbert, but the flavor is quite intense. It seems about one year in five, we have the combination of a big crop of hazels AND a low population of squirrels, so we get to eat a few. Absolutely delicious.


No comments:
New comments are not allowed.